Baby Cakes
"Thank you for your website and its wonderful ideas!"
This category is full of cakes with babies. You will find great photos and tips below submitted to us by our readers. View other categories by clicking on the edible cake link below. You can also share your cake photos and tips with us after you make your cake. We would love to see it!
Baby Theme Cakes Index
Photo submitted to baby cakes gallery by:
Heather Y. from Batesville, Mississippi
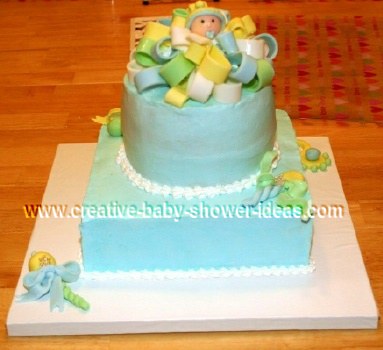
This boy baby shower cake is made of vanilla pound cake with buttercream icing and fondant accents.
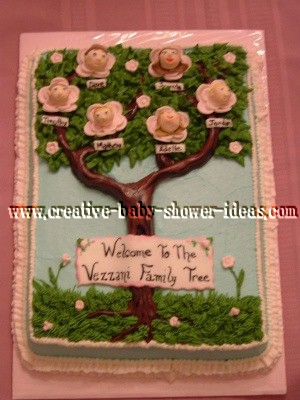
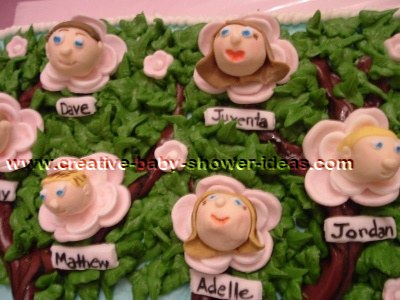
This cake was made for a woman how was having her 5th child. So I made the family tree and made each person look like each member of the family.
All accents are fondant. The leaves are buttercream!
Photo submitted to baby cakes gallery by:
Marvin B. from Ballwin, Missouri
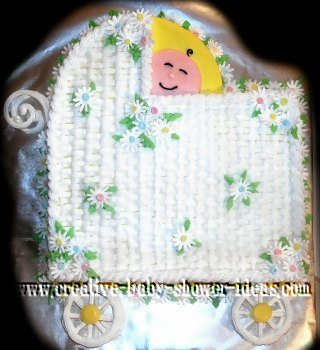
For this baby shower cake, the flowers, wheels, and handle are made out of royal icing. I used color flow to make the baby and the hubcaps. The icing on the cake is buttercream.
Photo submitted to baby cakes gallery by:
Dawn D. from Cumming, Georgia
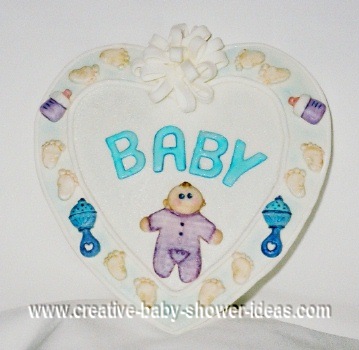
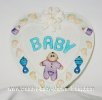
This baby plaque is made from a 6 inch fondant cut heart with another 6 inch by 1 inch border overlay. I used a little baby push mold to make the baby and highlighted it with luster dust to finish it off.
This baby plaque is also being published in a cake decorating book written by Diane Shavkin. It is an exciting accomplishment for my baby project.
Photo submitted to baby cakes gallery by:
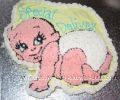
Shawna G. from Surrey, BC Canada
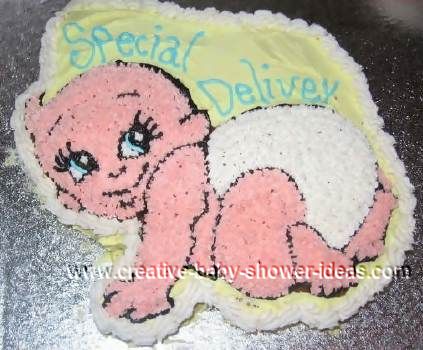
I just rented the pan from a local cake decorating store and decorated it with icing!
Photo submitted to baby cakes gallery by:
Dawn D. from Cumming, Georgia
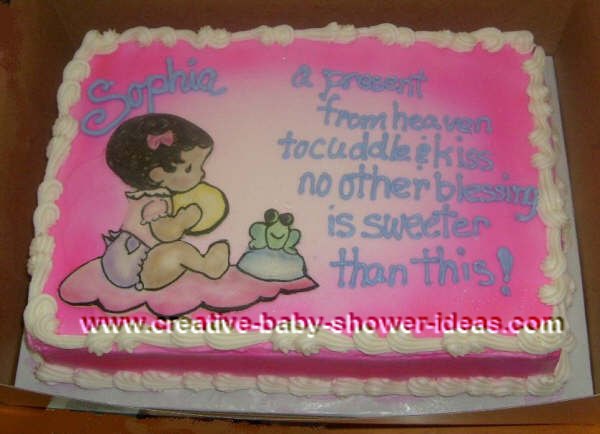
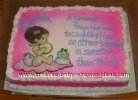
This is a hand painted fondant picture for a little girl, just lay it on top of the cake and write your saying on the cake.
Photo submitted to baby cakes gallery by:
Kimberly W. from Milwaukee, Wisconsin
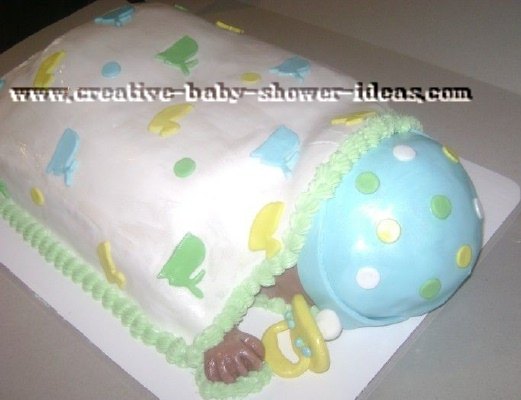
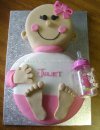
First I took 3, 1/2 sheet cakes and stacked them. Then I cut the shape of cake, I made the head with another round cake cut in half and stacked. Then I made the babies feet, and hands with fondant and covered the baby with different colored fondant. The whole cake took 4 hrs. to make because of the shaping and detailing. But it was worth it. It came our great!
Photo submitted to baby cakes gallery by:
Jenni W. from North Charleston, South Carolina
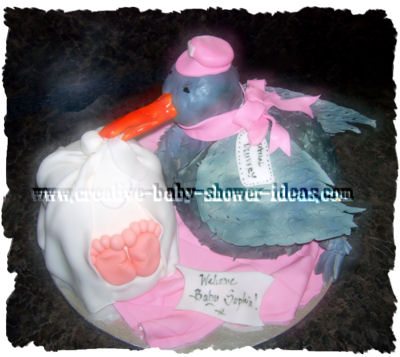
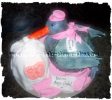
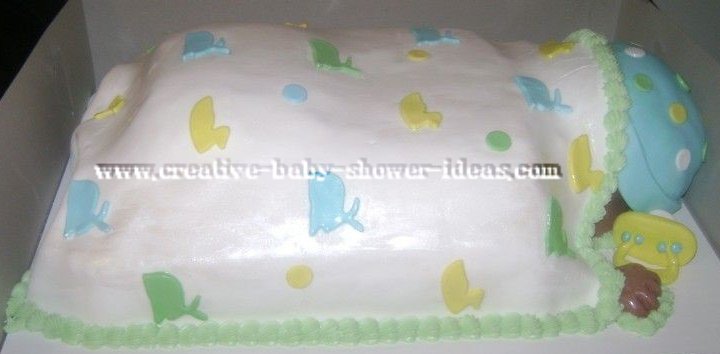
I used an upside down Pyrex bowl to bake the 'baby' inside of the wrap. I used another deep bowl to bake the stork. All fondant accents and I airbrushed the stork. His head is made out of rice krispie treats because cake wouldn't be strong enough to hold up the beak.
Photo submitted to baby cakes gallery by:
Jenny W. from North Charleston, South Carolina
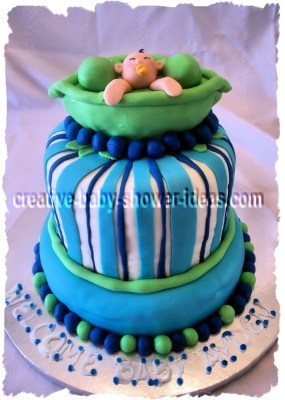
I stacked 10" and 8" cakes and covered them in fondant. I added the stripes and then molded the pod and baby face out of fondant as well.
Photo submitted to baby cakes gallery by:
Linda L. from Crestline, California
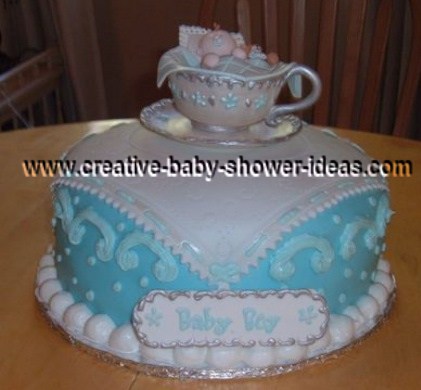
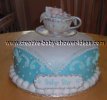
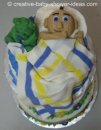
I made this cake for my daughter's baby shower which was a tea party theme. The cake itself is a 10" round chocolate cake with 4 layers filled with a buttercream and cream cheese mixture and covered with fondant. I made the tea cup and saucer from gum paste. I made the saucer by rolling out the gum paste to 1/4" and after cutting it into a small saucer size circle I put a real saucer upside down and laid the gum paste on the saucer to dry. For the tea cup used a very small glass bowl, coated it with shortening and formed gum paste over it. After it dried I added a gum paste handle decorated it with royal icing and painted the saucer and cup with luster dust. I then made the baby and teddy from gum paste and pillow and after they dried put them in the cup and covered them with a gum paste blanket.
Photo submitted to baby cakes gallery by:
Dawn D. from Cumming, Georgia
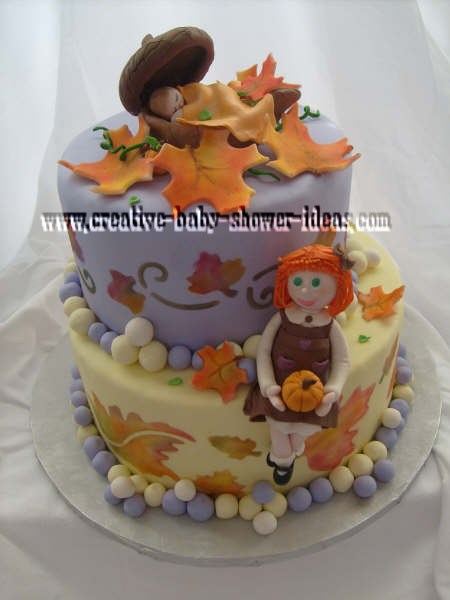
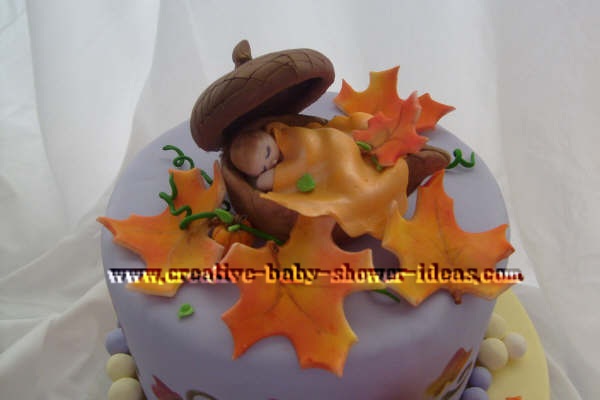
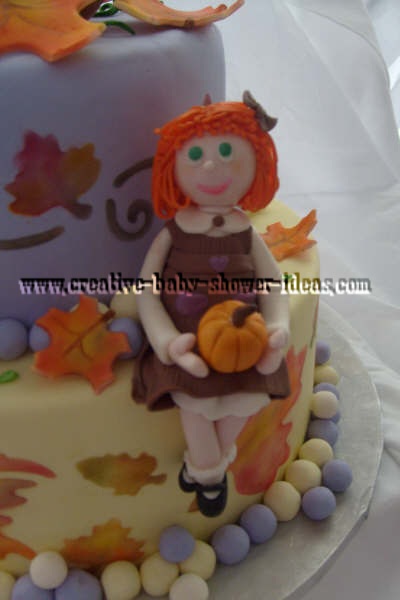
Here is a fall leaf baby cake I made for a baby shower. Some of the photos are a little detailed but basically I use cookie cutters for the leaves on the acorn baby, baby shower cake and hand stenciled the sides of the cake with a stencil bought at Michael's. The fondant characters are hand molded and each one is uniquely different than one another easy to make just very time consuming but the end product is wonderful.
Photo submitted to baby cakes gallery by:
Linda M. from Alpharetta, Georgia
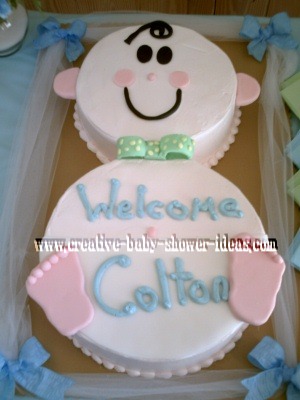
This baby cake was made with 2 layer cakes 9 inch and 12 inch. I used fondant for face and feet and diaper. That's it!
Photo submitted to baby cakes gallery by:
Adeliz W. from Tacoma, Washington
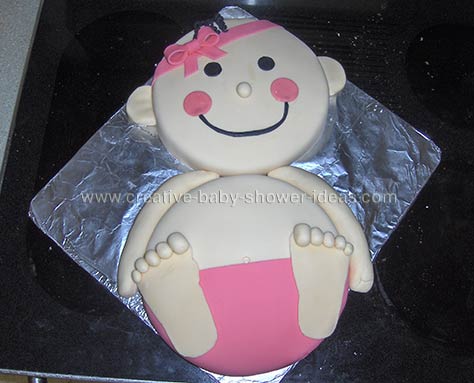
Two 9 inch round cakes frosted then covered with fondant. Arms are fondant and so are feet and toes. Diaper and head band are fondant colored pink.
Photo submitted to baby cakes gallery by:
Michelle B. from Edgewood, WA
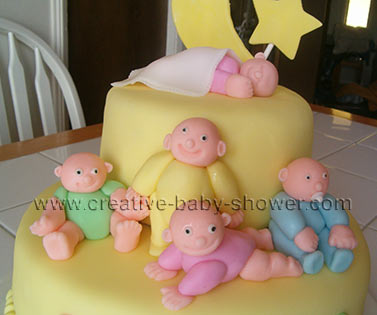
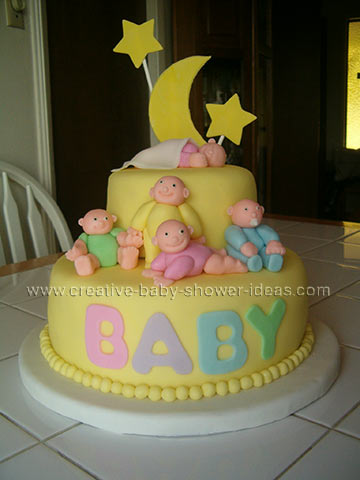
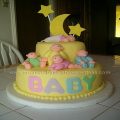
Make one two layer 10" Cake in your choice of flavor/Filling mine was Lemon w/lemon filling and make one two layer 6" cake in your choice of flavor/filling mine was Red Velvet with buttercream filling.
While cakes are baking Tint your fondant the color of choice mine was very little lemon yellow, I also tinted small amounts of Pink, Blue, Green, and very light peach. After you have baked and filled cakes cover with a crumb/light coat of buttercream for fondant to attach to, apply very thin bead of piping gel at base of cakes for fondant to glue to. Roll Yellow fondant to between 1/8" and 1/16" and big enough to cover each cake individually and prepare for stacking the 6" cake on the 10" cake ( I off set the top tier so I would have room for the babies)
After the stacking is completed start making the babies by getting 1 1/2 inch ball of the colors for the body area of the babies, make it into a pear shape use your ball tool to make indents for arms and legs. Use Peach to make heads and arms and legs shape as you would like (for long sleeves and legs like pajamas use same color as body) for eyes use very tiny white and attach with gum glue then use food writer in black to make pupils, for nose use tiny amount of the peach and roll and attach with the gum glue. Use the small veining tool to shape mouths or tiny amount of fondant in your choice of color and flatten and then another tiny ball and attach for the binky. For sleeping baby use a head, body and arm then cover with a 3x3" fondant blanket.
Use gum-glue (1/4 tsp. gum paste and 1 tablespoon water) to attach heads, arms, and legs. Let dry for a couple hours on wax paper.
Use the large star cutter to cut out a 1/2 gum paste-1/2 Fondant in yellow to make the stars and cut a 5" circle and then cut again to make the crescent shape to make the moon and allow to dry on wax paper for a couple of hours.
I used the Wilton alphabet cookie cutouts to make the BABY Lettering out of the pastel colors and attach with the gum glue.
Make 1/4" to 1/2" Balls to Finish off the bottom and Middle also, attach with the gum glue so they don't roll off.
Use 3 cookie sticks in various sizes and attach to the back of the stars and moon and allow to dry for about 1/2 hour. Finally attach the babies where you would like them, place sleeping baby on top of cake and insert stars and moon on top behind sleeping baby. All done!!
I got the Idea out of the Wilton Fun with Fondant book and made it my own.
Photo submitted to baby cakes gallery by:
Michaela R. from Imperial, MO
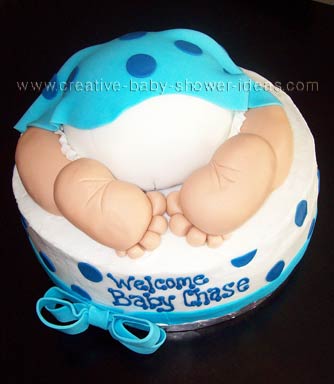
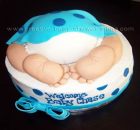
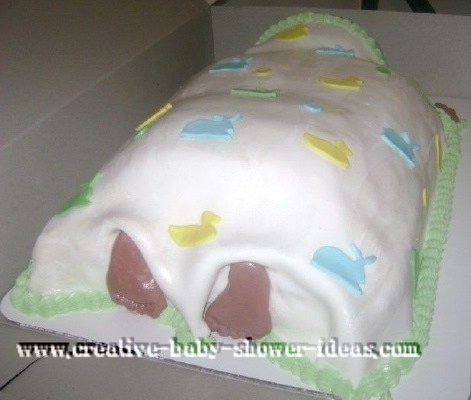
I made a cake in a half ball pan (you can also use a Pyrex bowl) to make the butt and covered it in white fondant. I put it on top of a 12 inch round cake because mine had to feed 40 people. I used some cake pieces to form the legs and shaved them a bit to look rounded, them covered them in flesh colored fondant. I made the feet with rice krispie treats and covered them with a thick layer on fondant, then made some fondant toes. Use a knife to make the indentations (wrinkles) on the feet. I rolled out a piece of fondant for the blanket, decorated it and then laid it over the rump. I also frilled a piece of white fondant and put it where the leg meets the diaper to make the diaper look more realistic.
Photo submitted to baby cakes gallery by:
Susan S. from San Juan Bautista, California
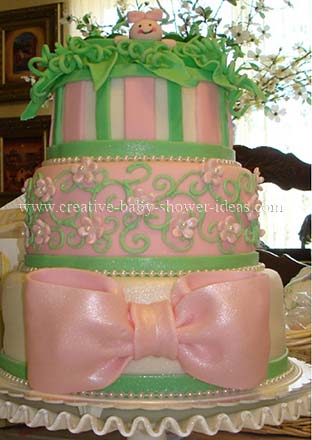
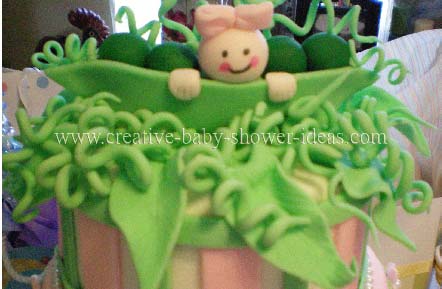
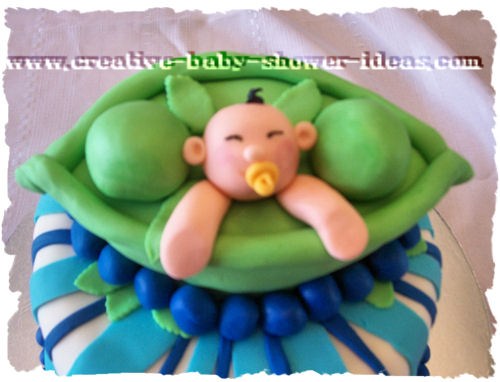
I used 10, 8, 6 inch size pans. After layering and covering in buttercream, I covered each cake in fondant. These were then stacked and decorated with scroll work and giant fondant bow. The pea pod and baby pea and vines were all made from fondant. It is important though that you make the pea and pod at least 24 hours in advance, giving it time to dry. Fun cake to make!
Photo submitted to baby cakes gallery by:
Leslie F. from Ontario, British Columbia, Canada
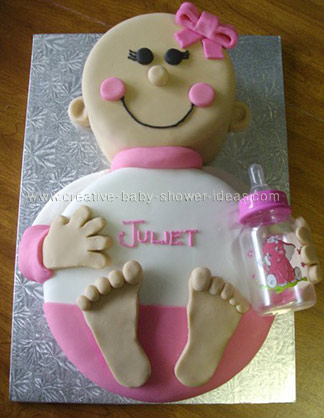
This was a French Vanilla Cake with raspberry filling.
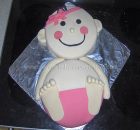
I started with baking 2 cakes. One small 6" round cake and one medium 10" round cake. Once they were baked and cooled, I filled them with raspberry filling. I covered the head with flesh tone fondant and covered the body with white fondant. Using pink fondant I covered the bottom of the body. Next, I made hands, feet, a nose ears and eyes made of flesh tone and black fondant. I rolled out a thick piece of fondant for the arms and pasted them onto the cake.
Tip: When pasting pieces to a cake a good "glue" to use is powdered sugar with a drop or two of water. It becomes "pasty" like and since it's sugar, when it dries it hardens. I then pasted all the other pieces (eyes, ears, nose and feet) onto the cake. Once everything was almost done, pasted the baby bottle onto the cake and placed the hands on as well. The baby's left hand was placed on top of the bottle.
Tip: When placing the hand on top of the bottle use the "glue" to paste it on. Once it's on, place a wet cloth on the bottle until the "glue" dries and remove the cloth.
Photo submitted to baby cakes gallery by:
Marabeth B. from Millerton, PA
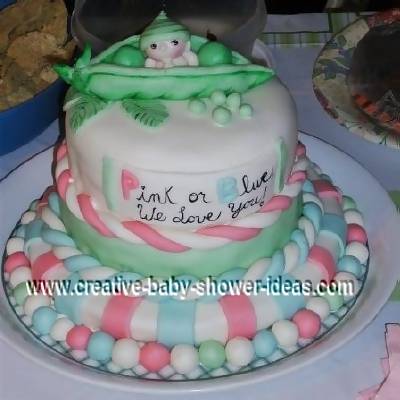
This Sweet Pea cake was made for a "Guess the Sex Party"
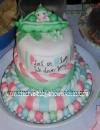
I used 4 round cakes in different sizes and lots of Marshmallow fondant. I choose to make my own marshmallow fondant because it's much easier to work with and taste is so much better then the bland store bought varieties. I sculpted the baby in the pea pod topper out of fondant as well and then painted all the little details with a fine brush a Wilton food coloring gels. The cake turned out quite cute and it was also really yummy!!!
Photo submitted to baby cakes gallery by:
Livia S. from Schenectady, New York
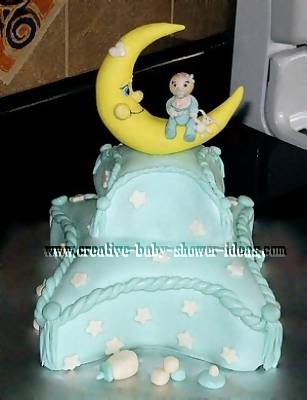
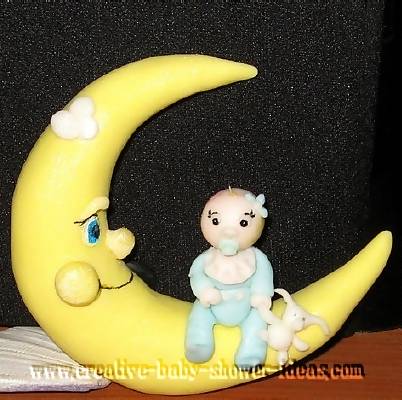
Bake strawberry cake, freeze and carve with a knife in shape of pillows cover with a thin layer of icing and marshmallow fondant. Put dowels in the first pillow cake and stack the second on top. The topper baby with bunny on the moon was hand made from gum paste. Little stars were cut with a cookie cutter and glued to the cake.
Photo submitted to cake gallery by:
Vanessa R. from Wichita, Kansas
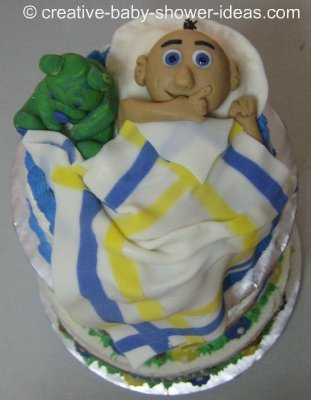
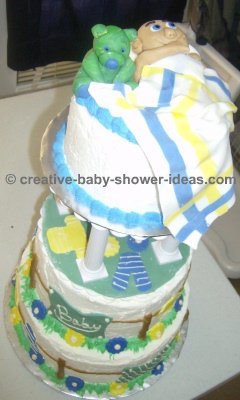
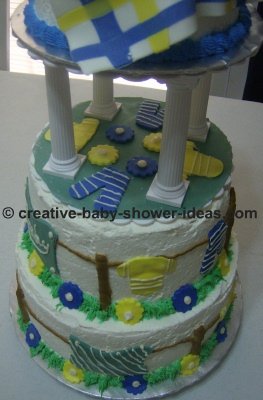
I used 10, 8, and 6 inch cakes. I made the baby, blanket, and bear 2 days in advance with a 50/50 mix of gum paste and fondant that I made at home. The clothing, flowers, were made the same day I put the cake together that way they would be soft Enough to form to the cake itself. The clothing line and grass is made with icing. It was a hit at the shower and especially with the mom to be!
Photo submitted to cake gallery by:
Derek S. from Wyoming, MN
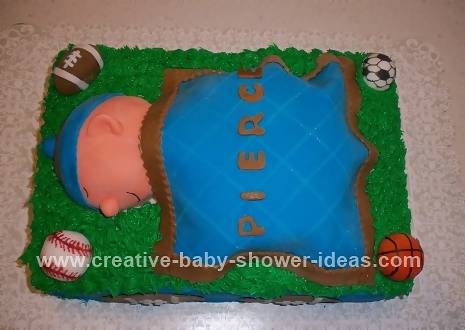
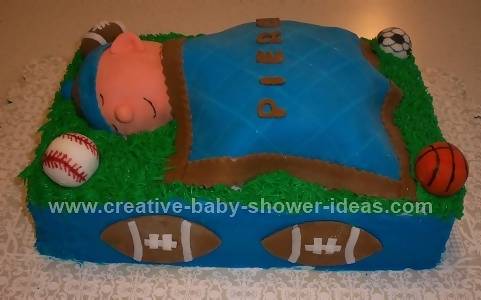
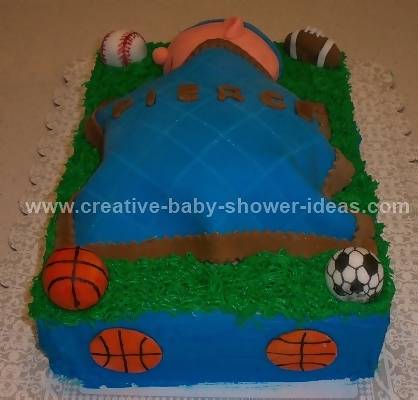
Buttercream frosting with fondant sports balls and baby blanket and hat.
Photo submitted to cake gallery by:
Dawn B. from Hobe Sound, FL
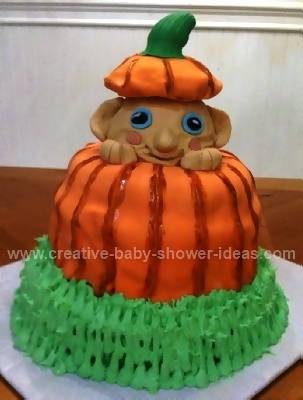
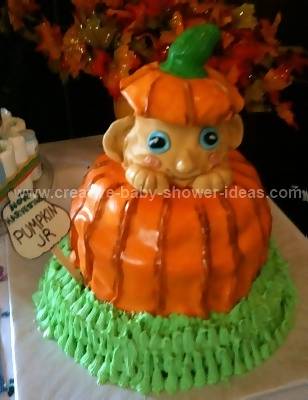
I made this cake for my old college roommate. She always called her baby "Lil' Pumpkin or Pumpkin JR." she was having her little boy in the fall around Thanksgiving so the pumpkin theme really worked. I made this cake all from scratch. I made a delicious pumpkin flavored cake with cream cheese icing covered with fondant. I shaped it into a life like baby coming out of a pumpkin. To do this I baked two Bundt cakes and frosted them and stacked them on top of each other to shape the pumpkin. I cut off the bottom of the cake to make it level so it would stand nice. I used the piece I cut off to use as the top of the pumpkin on the baby's head. I then baked two smaller cakes in small metal bowls, iced them and stacked them on top of each other to form the babies head. I refrigerated the cakes frosted to help firm up the icing so I could make it smooth. Then I covered it with fondant tinted to the color desired. I hand painted with food coloring to achieve the shading in the babies face and the pumpkin. I piped green frosting around the pumpkin to look like the pumpkin was sitting in grass. I made a sign from wood and burned with a wood burning kit "Now Harvesting Pumpkin Jr." to complete the pumpkin patch look. This cake turned out beautiful and was a huge hit!!! It stood over 16" tall.
Photo submitted to cake gallery by:
Tracy C. from Barnesville, GA
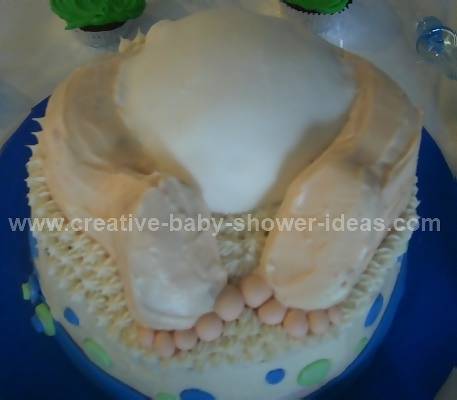
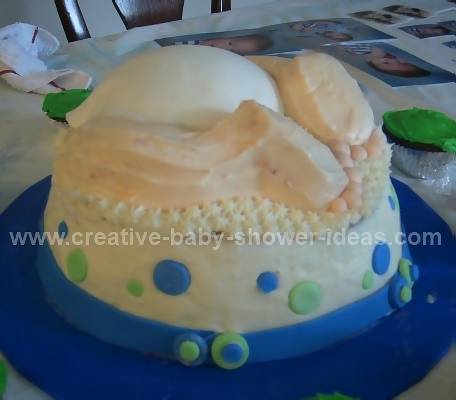
I started with two 8" Round pans. Making a two layer cake. I baked a third to be carved and a small smooth Bundt cake for the legs and feet. With the third cake I rounded out for the baby's bottom, placing it on top of the icing two layer cake. With the Bundt pan cake I cut out two legs and two feet placing them next to the baby's bottom. With marshmallow fondant I formed the diaper. Just a flat round circle. Making sure not to make it too flat on the top end. With skin colored fondant I made tiny toes. Make sure that the color of the toes and legs match in color. With the left over fondant I colored them blue and green to match the decorations. I cut out a blue inch strip to go around the base of the cake and circles out of the blue and green to decorate the base.
We had a blue and green baby shower for my oldest daughter. To match her baby furniture that she wanted. (Old fashion Winnie the Pooh.) The cake was vanilla, and the icing is also vanilla. This was her second child and I wanted to do something special. She was always joking and I googled babies and showers and came up with some crazy pictures. My other grandson was running around the table and my youngest daughter thought it would be funny if Preston ran into the cake. Well that was it, the perfect cake. It looked a hot mess when I was making it, my sister-in-law said, but my husband said that she had not seen anything yet.
Photo submitted to cake gallery by:
Marshelle W. from Amboy, WA
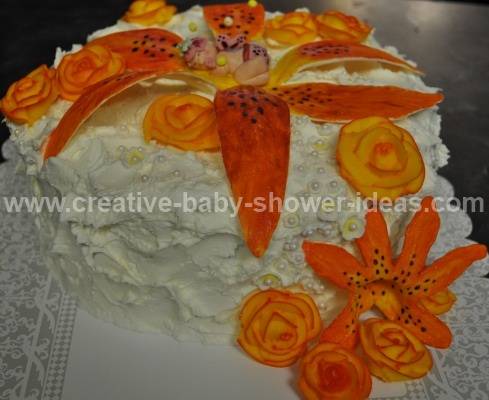
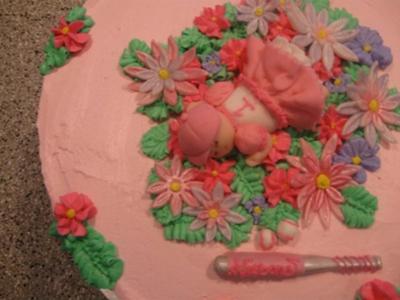
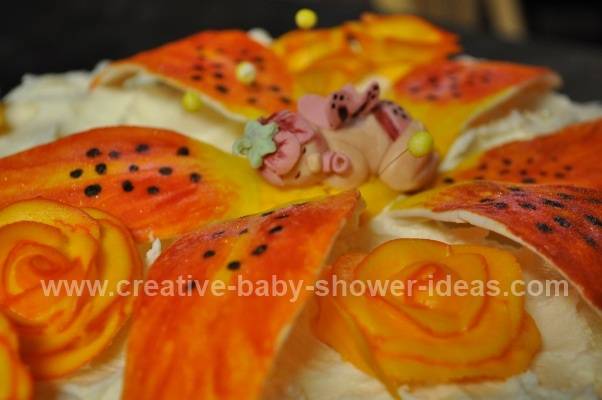
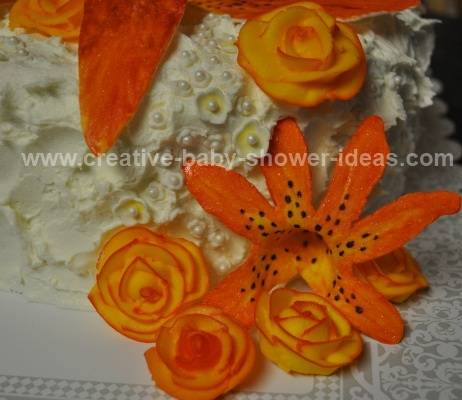
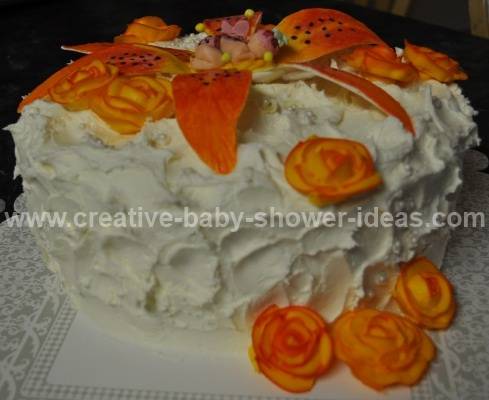
I cooked 2 white cakes in a 10" round pan. Made a frosting and raspberry filling and assembled cake morning of shower. 3 days before shower I molded gum paste to make the baby girl, lilies, and little white flowers. 2 days before shower, I painted the lilies. The night before the baby shower I made the yellow and orange roses with Royal icing. The morning of the shower I assembled the whole cake.
Photo submitted to cake gallery by:
Celeste R. from San Jose, CA
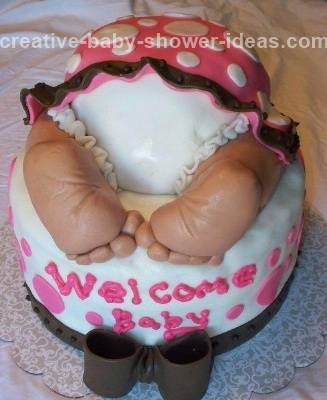
For the baby rump I made a round cake and trimmed the sides where the legs would go. I used the savings to form the legs and feet. Then I covered the legs with fondant before putting the diaper. Then I covered the feet and made the toes and decorated the diaper.
Photo submitted to cake gallery by:
Tamisha D. from Baltimore, MD
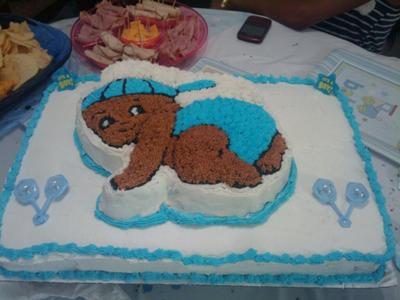
I wanted to make my niece a baby shower cake for her first baby. Not only her first baby, but the first baby boy in the family for 28 years...
Photo submitted to cake gallery by:
Torri H. from Presque Isle, Me
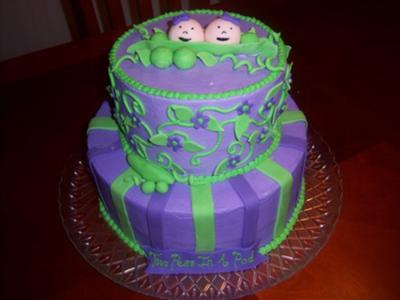
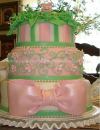
This baby shower cake was designed for a mother to be of twin girls and was inspired by her invitations. This two tier cake is done in buttercream with fondant accents.
Photo submitted to baby cakes gallery by:
Torri H. from Presque Isle, Me
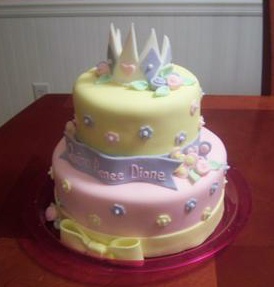
This princess baby shower cake was designed for a princess themed baby shower. I covered it in fondant and the accents are done in fondant and edible pearls.
Photo submitted to baby cakes gallery by:
Angel R. from Georgia
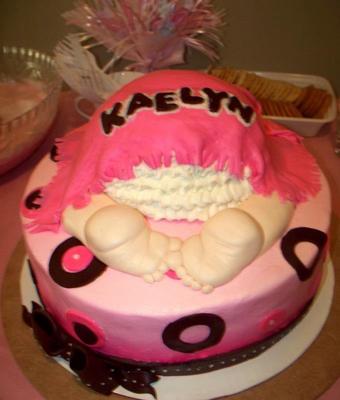
This is a baby shower cake that I made for my niece. Her colors were brown and pink. I used a 10 inch round cake pan and a 1/2 ball cake pan from Wilton. I made my own fondant from marshmallows and powdered sugar. I learned how to make it by watching a how to youtube video. I used the Wilton buttercream recipe to frost the cake and then decorated with fondant polka dots. The blanket and baby's legs/feet are also made from the fondant. I used a fork to mash the edges of the blanket to give it a frilled look. I made the bow from modeling chocolate which I also learned to make by watching another youtube how to video. It is easy to make, only 2 ingredients: chocolate chips and corn syrup. I made the ruffles on the bottom by using a rose petal Wilton tip and moving up and down as I squeezed and moved across row by row.












New! Comments
Have your say about what you just read! Leave me a comment in the box below.